

If you love the Sundress highlighted last week, you'll appreciate these detailed assembly instructions.
A key feature of this tutorial: 2 different ways to gather with elastic:
- elastic enclosed in a simple casing
- shirring using elastic thread
Both are great tools to have in your sewing/crafting toolbox, particularly if you make children's clothing!

Assembly Overview:
There are just a handful of steps to assemble these pieces:
1) attach the Dress Border to the Dress
2) stitch the side (or back) of the dress & finish the seam
3) create the casing for the elastic & thread the elastic to size the dress to your little one
4) finish the raw edges of the Straps/Sleeves & gather or 'shirr' the sides to fit
5) attach the Straps/Sleeves to the Dress
6) hem the Dress
The detailed instructions with photo illustrations follow.
1) attach the Dress Border to the Dress
 |
| Figure 1 |
a) Pin the Border to the Dress, Right Sides together (Figure 1)
 |
| Figure 2 |
 |
| Figure 3 |
b) Stitch the Border to the Dress (Figures 2 & 3); if using a standard machine, use a 1/2" seam allowance & finish the seam
 |
| Figure 5 |
 |
| Figure 4 |
d) Topstitch, by stitching close to the seam from the right side of the Dress. I use the presser foot as a guide to be sure I keep my stitch straight and a consistent distance from the seam. (Figure 5)
2) stitch the side (or back) of the dress & finish the seam
 |
| Figure 6 |
 |
| Figure 7 |
a) Fold the Dress in half, right sides together (Figure 6). This will either be the back or side of the Dress. I place the seam at the side to make the dress look like a single circle of fabric
3) Create the casing for the elastic & thread the elastic to size the dress to your little one
 |
| Figure 8 |
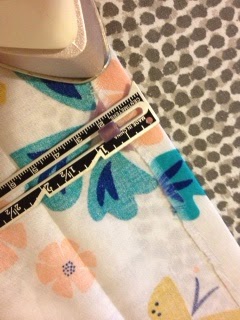
a) Fold the top of the Dress over 2 1/2" to make room for the elastic casing & a little self 'ruffle' above the elastic (Figure 8).
 |
| Figure 9 |
 |
| Figure 10 |
b) Unfold the casing & fold under 1/2" of the raw edge (Figure 9); alternately, you can finish this raw edge. I like the cleaner look of a folded edge, so prefer to fold under the raw edge
c) Press the casing (Figure 10)
 |
| Figure 11 |
 |
| Figure 12 |
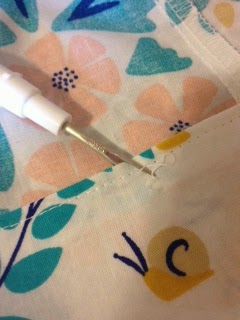
This opening will be used to insert / thread the elastic through the casing. No worries if you forget to leave this opening. A seam ripper can do the job in taking out a few stitches near the seam. (Figure 12)
 |
| Figure 13 |
 |
| Figure 14 |
f) Cut a length of 1" elastic to fit around the chest, just under the arms
Tip: Measure using the elastic rather than a tape measure, pulling a little, but not too, snug. Add an inch to allow for overlap to secure the elastic AND to allow for room for your little one to grow.
 |
| Figure 15 |
 |
| Figure 16 |
 |
| Figure 17 |
 |
| Figure 18 |
 |
| Figure 19 |
i) Stitch the casing opening closed (Figure 19).
4) finish the raw edges of the Straps/Sleeves & gather or 'shirr' the sides to fit
 |
| Figure 20 |
 |
| Figure 21 |
 |
| Figure 22 |
a) Fold under the long edges of each 'strap/sleeve' 1/4" & press (Figure 20)
b) Fold under each long edge again to enclose the raw edge & press (Figures 21 & 22)
 |
| Figure 23 |
 |
| Figure 24 |
c) Stitch the long edges of each 'strap/sleeve' (Figure 23) and now your raw edges are finished (Figure 24)
 |
| Figure 25 |
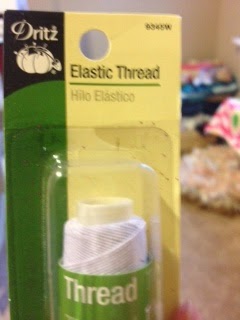
Shirring with Elastic Thread
Here are some tips to prepare, if you've never worked with elastic thread. The only special item you'll need is the elastic thread - you use a standard bobbin and standard needle and thread for the primary thread. See Figure 25 for a sample of how the product is packaged. |
| Figure 26 |
 |
| Figure 27 |
I) Thread a standard bobbin with the elastic thread. Do this by hand, wrapping the elastic thread around the bobbin, keeping the thread only slightly taut. (Figures 26 & 27)
 |
| Figure 28 |
 |
| Figure 29 |
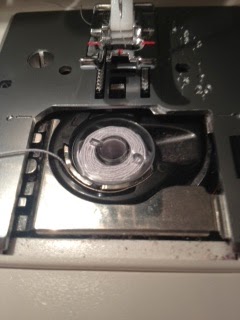
II) Place the bobbin in your machine as you would standard bobbin thread.
Tip: It's important to have the direction of the bobbin thread correct, to ensure the thread remains taut when sewing.
For my machine, I place the bobbin in the bobbin case with the thread wound clockwise. Then I bring the end of the thread counterclockwise to catch in the bobbin case (Figure 28). Figure 29 shows the end result.
NOTE: When I've mistakenly wound the bobbin counterclockwise, the elastic did not remain taut enough to produce the shirring effect.
III.) Stitch on the Right Side of the fabric, with a slightly longer stitch than standard. After some experimenting, I've settled on a stitch length of somewhere between 3 & 4. For shorter piece lengths, I use 3. For longer piece lengths, 4 seems to work best. Be sure to secure the start & finish of your stitch to prevent the stitch from unraveling; back-stitching works well.
To create the shirring effect, stitch multiple rows close together. I stitch one row, back-stitching at the start & end of the stitch. Then, I turn the fabric and stitch close to the first row, also back-stitching at the start & end of the stitch. I continue this approach for all rows - more rows results in a tighter shirring effect.
When you have the desired number of rows, use a steam iron to further shrink the elastic for the look you're seeking. And, there you have a very simple way to create shirring!
 |
| TIP: DON'T STITCH THIS WAY! |
NOTE: Remember to stitch from the Right Side of the fabric, so the elastic thread from the bobbin is on the Wrong Side of your garment.
We'll pick up from 4. c), finishing the raw edges of the 'straps/sleeves'.
Stitch the first row about 1/4" from the finished edge of the strap. Remember to stitch Right Side Up! Back-stitch at the start & finish of the stitch. (Figure 30)
For the 2nd row, with your needle in the up position, turn the strap & shift the strap to the left. Stitch the 2nd row close to the first row. (Figure 31)
Tip: Be sure to hold the top & bobbin thread taut when turning and positioning the garment. While still holding the threads taut, lower the needle to the down position, lower the presser foot & slowly begin the stitch. Remember to back-stitch at the start & finish of the 2nd row.
Create the 3rd row as the 2nd: With your needle in the up position, turn the strap & shift the strap to the right this time. Stitch the 3rd row close to the second row. (Figure 32)
 |
| Figure 30 |
 |
| Figure 31 |
 |
| Figure 32 |
Figure 33 shows the end result of the first side of the strap, and Figure 34 shows the end result of both sides of the strap. Steam the strap to further shrink the elastic resulting in the finished strap shown in Figure 35.
Repeat these steps for the 2nd strap.
 |
| Figure 33 |
 |
| Figure 34 |
 |
| Figure 35 |
5) attach the 'Straps/Sleeves' to the Dress
 |
| Figure 36 |
 |
| Figure 37 |
a) Pin each Strap to the Front & Back of the Dress, Right Sides up. (Figure 36)
Tip: Position the straps so they line up with the casing. Then, when you stitch, you can stitch on top of the casing stitch. It will have a cleaner look from the front of the garment. (Figure 37)
b) Stitch across the width of each strap.
Tip: Be sure to stitch slowly to ensure you don't catch the elastic enclosed in the casing in your stitch!
6) hem the Dress
 |
| Figure 38 |
 |
| Figure 39 |
a) Fold under the bottom edge of the dress 1/4" & press (Figure 38)
b) Fold under again to enclose the raw edge & press (Figure 39)
 |
| Figure 40 |
 |
| Figure 41 |
c) Stitch the bottom edge (figure 40) and now your raw edges are finished (Figure 41)
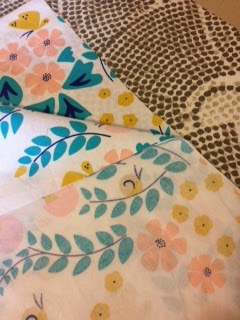
And, that's it! These lighter shade fabrics of the Lotus Pond line are perfect for spring & summer. Choose darker fabrics from this same line or others & have your little one wear over a t-shirt for fall and winter. Have fun creating!
No comments:
Post a Comment